Note that this description (and esp. the images) mostly still relates to VisualMR V1.6 and needs updateing but most of it is already valid for V2.
VisualMR is available for PocketPCs and Windows. For both platforms the application looks very similar. Therefore I'll describe its features on this page based on PocketPC screenshots if the basic functions are the same on the PC (since the PocketPC screens are smaller). On a PC you can select between 4 different window sizes (both larger and smaller than the PocketPC screens shown below) so that you can use your screen more efficiently.
At first you add your SoundBridges to the list of clients. Since V0.9.7 VisualMR this is done automatically by VisualMR making a 'UPnP-search'. Alternatively you can add SoundBridges manually by entering name and IP address using 'Add New' in the 'SoundBridge' menu. If you don't know the IP address there is an easy way described in the FAQ.
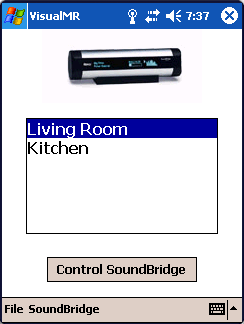
To control a SoundBridge just select the client from the list and press 'Control SoundBridge'. This will turn your SoundBridge turned on, if it in standby. After successfully connecting to the SoundBridge, VisualMR will switch to the 'Now Playing' screen.
'Now Playing' is a at-a-glance status display as well as the place where the basic remote control functions are available. In the upper part VisualMR will display information about the current title (like album, year, genre, bitrate, ...) and the state of the SoundBridge (repeat, shuffle, volume ...).
The visual appearance including the layout of all controls can be adapted by installing a different VisualMR-Skin. Additionally there might be multiple layouts to choose from in the 'File' menu. With the provided default Skin ('BlueGlass') this form looks as follows (from left to right the three different layouts 'Buttons', 'Info' and 'Cover'):
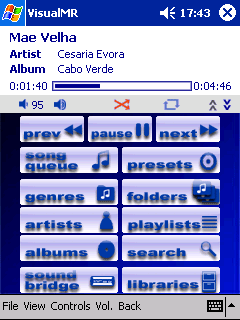
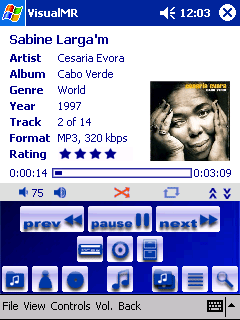
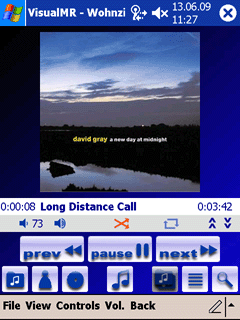
In the upper (white) part information about the current song is displayed. Then there is a lightgrey row showing the current SoundBridge state (volume, shuffle and repeat). Note that clicking the small speaker symbols will increase/decrease the volume. And clicking the shuffle or repeat icon will cycle that state. At the right hand there are small double-arrows. These will loop through the three layouts displayed (effectively moving the grey bar up or down).
In the lower part 'Now Playing' provides controls for 'Play'/'Pause', 'Prev'ious song and 'Next' song. Further commands like 'Stop' (typically you'll want to use 'Pause' instead of 'Stop') and 'Power Off' (put your SoundBridge in standby mode) are located within the "Controls" menu. Additionally there is the 'Vol.' item in the menu bar to set the volume from 0% (off) to 100% (max.).
You can always switch between all forms using the 'View' menu or the corresponding buttons. Besides the already described 'Select SoundBridge' and 'Now Playing' you'll find 'Browse Song Queue', 'Search', 'Browse Playlists', 'Browse Artists', 'Browse Albums', 'Browse Composers', 'Browse Genres', 'Browse Folders', 'Play Preset' and 'Change Library' in the 'View' menu. PCs additionally feature 'Open Jukebox' for a combined browsing of the music library.
Hints:
The 'Song Queue' is the dynamic playlist of the SoundBridge where all songs scheduled for playback are temporarily stored. If you are connected to 'Internet Radio' this will list the stations stored in your SoundBridge.
If you select a song in this list it will (after a short while) be expanded to display Artist, Album track number and duration.
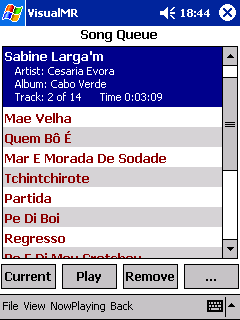
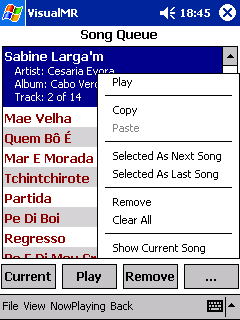
To skip to a specific song just select it in the list and press 'Play'. This will also return you to the 'Now Playing' screen.
To move a song to a different location in the queue just 'Cut' or 'Copy' it (it will be marked with a border) and the select the location where you like it to be and press 'Paste' in the context menu. Note: Songs located after the one currently playing are moved ('Cut') while the other songs are copied ('Copy').
Hint: All lists can be controlled by keyboard shortcuts:
'Selected As Next Song' moves the selected song to the position after the currently played song making it the next song to play.
'Selected As Last Song' moves the selected song to the end of the queue.
'Remove' deletes the selected song from the song queue (but not from your library). 'Clear All' deletes all songs from the song queue.
'Current' / 'Show Current Song' selects the currently playing song in the list.
The menu bar contains besides the 'File' menu a 'View' menu for switching between forms, a 'Back' button for switching to the last used form and 'NowPlaying' as a one-click shortcut to the main form.
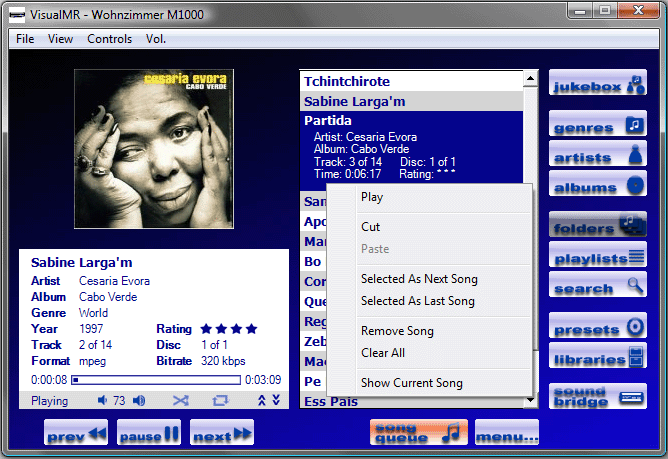
If you have installed additional VisualMR Skins you will find them in the 'File'/'Skin' sub menu.
On Windows PCs (not PocketPCs) you can switch between different window sizes as described here.
Select one of the layouts provided by current skin. For the default 'BlueGlass' skin there are
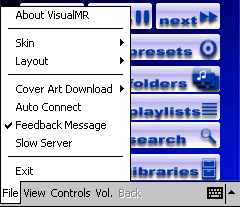
The cover art displayed is downloaded from Amazon . Since this requires an internet connection and sending album and artist name to Amazon you must enable CoverArt download by selecting the Amazon server near you. If download from Amazon is disabled covers are only displayed if the artwork is located as an image in the local 'Cover Art' folder. More about Cover Art and Amazon can be found in my F.A.Q..
After checking 'Enable Browse Cache' in the 'File/Cache' menu VisualMR will cache the lists of artists/albums/... This will speed up browsing (especially when going "Back") but changes to the music library might not be visible in VisualMR until you select "Clear Cache" and reload the current list. Note that the cache is also cleared after disconning from the SoundBridge (including exiting VisualMR) or selecting a different library or preset in VisualMR.
After connecting successfully you can activate 'AutoConnect' from 'File' menu. This will instruct VisualMR after application start to skip the 'Connect SoundBridge' form and directly use the SoundBridge you've connected to last time.
If checked all scrollbars will have the duplicate width. This is especially handy for operating VisualMR with a finger on a PocketPC or TabletPC.
If this is turned on (default setting) browsing albums, artists,... will open in a second window. If turned off the behavior is like on a PocketPC: the browsing window will be opened in place of the 'NowPlaying' window.
If this option is selected a success-message is displayed after adding/inserting songs into the song queue.
If you regularly encounter timeout errors this typically is because your music server isn't responding fast enough (a slow computer/NAs or a very large music library). In this case activating the 'Slow Server' option in 'File' menu should fix your problems.
Here you can select the language VisualMR should use. Currently German and English are available. Note that VisualMR will shut down after changing the language and you need to restart it manually.
For PCs this corresponds to the upper-right close box. But on PocketPCs the upper right closebox does not shut down an application. Therefore I strongly recommend using 'File'/'Exit' instead of the closebox. This will ensure that auto connect is working as expected (auto-connect applies to launching an application not only reactivating it after being minimized using the close box). It's also a good idea to select 'Exit' to properly disconnect from your SoundBridge before turning your PocketPC/PC off.
This form shows all playlists defined in the current library (music server) so that you can select a playlist for playback by adding its songs to the song queue of your SoundBridge.
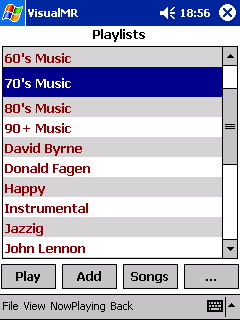
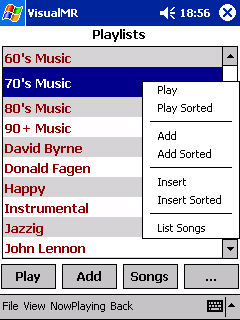
The buttons below the list are 'Play' (to play all songs from the selected playlist starting with the first title) and 'Add' (to add the all songs from the playlist to the end of the song queue). Additionally there is 'Songs': this will list all songs belonging to the selected playlist, so that you can select individual songs for playback. This is also the default action: if you press 'Enter' or double click on an item 'List Songs' will be called. More options are available using the list's context menu: 'Insert' will copy all songs from the playlist after the song currently playing. 'Play', 'Add' and 'Insert' are also available with the 'Sorted' option: The default order of the songs is provided by the music library. Sorting will rearrange the songs by their album title first and then by their track number.
Note: After an action like 'Add' succeeded the currently selected item will not be highlighted anymore (until you switch to different item). This is to give a visual feedback and therefore prevent accidentally adding songs twice.
The menu bar contains the typical items like described above: 'File', 'View', 'NowPlaying' und 'Back'.
Similar to 'Browse Playlists' described above there are forms to schedule songs of an artist, album, composer or genre for playback.
Please note that 'Browse Artists'/'Albums'/'Composers'/'Genres' is not supported by all types of music servers (especially simple UPnP servers cannot handle this kind of request).
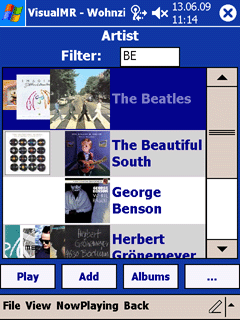
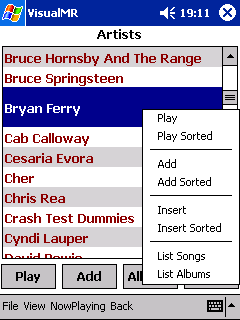
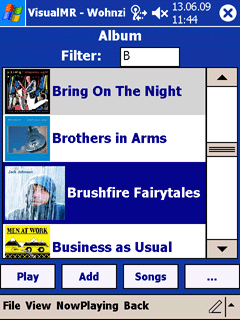
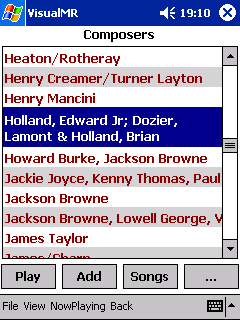
Please note that the 'Sorted' option is very useful for 'Browse Albums' since currently the order of the songs is otherwise undefined while 'sorted' will guarantee playing the songs in their original order. Sorting is also useful in 'Browse Artists': this will schedule all records of the selected artist for playback with each having its songs in its original order. Note that when using SoundBridge firmware 3.0 sorting isn't needed anymore.
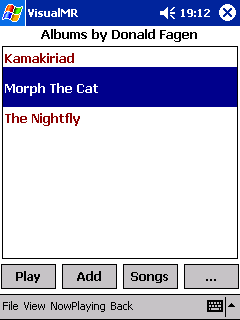
When browsing genres you can also show the list of albums or artists belonging to this genre. Similarily while browsing artist you can list all albums by the selected artist. This way you can navigate from genre to artists to albums (and then to the albums songs):
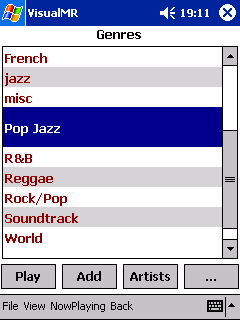
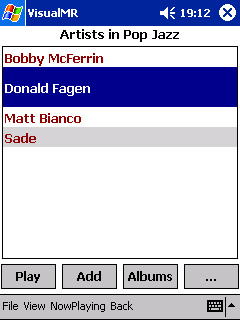
On a Windows PC you can brose genre, artist and album all in a single place, called the Jukebox window:
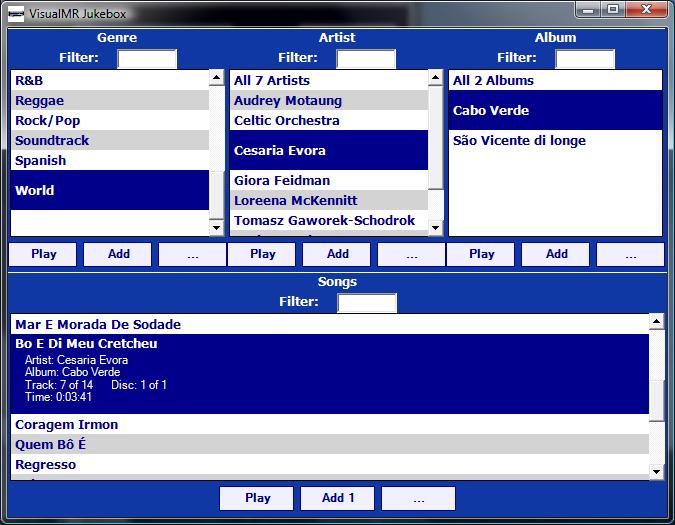
Please note that the window can be resized by dragging it on its outer border (and the window size is saved for the next time you open the window).
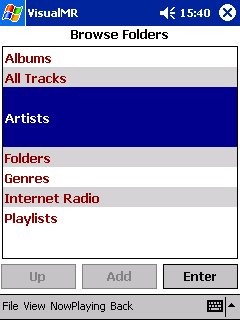
This form provides a means for browsing the music library using a hierarchical folder structure similar to the one you know from Windows-Explorer. This is a feature of UPnP servers only and therefore not available when you are connected to Firefly or iTunes. Some servers refer to these folders as 'server containers' or 'nodes'.
If you switch to 'Browse Folders' (not using 'Back') you'll be at the top level (which you'll reach using the 'Root' action). Starting from here you can drill down by selecting 'Enter' on a folder. Using 'Up' you'll go back to the folder level where you just came from. The path to the items currently displayed is shown on top of the list.
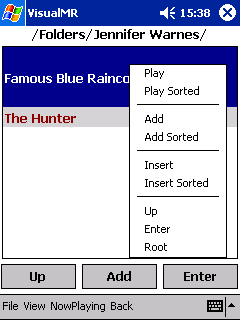
The functions for selecting songs are the same as described in 'Browse Playlists': 'Play', 'Add' and 'Insert' are available with/without 'Sorted' option. They work only properly if the item selected is either a song or does contain only songs (and not folders).
If your server supports searching, this form allows you to find songs, artists, albums or composers by entering (parts of) their name. Just enter the text to search in the text box and press the corresponding button.
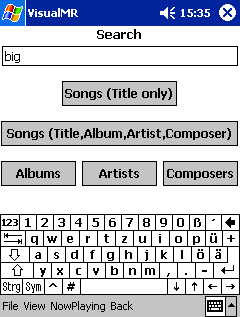
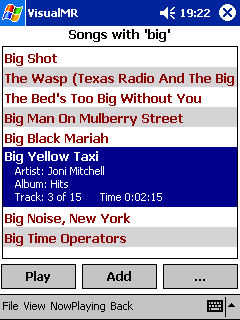
For searching songs there are two options / buttons available:
This form displays all music libraries your SoundBridge can access, including 'Internet Radio'. To connect the SoundBridge to one of them just select the server and press 'Play Library'
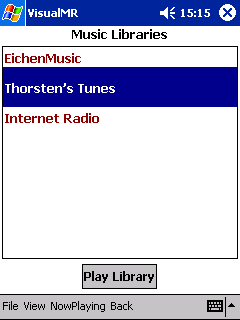
If you connect to 'Internet Radio' all stations stored in your SoundBridge will be added to the 'Song Queue' and playback will start with the first station. For other libraries VisualMR will switch to the 'Now Playing' screen from where you can switch to one of the 'Browse' forms in order to select songs for playback.
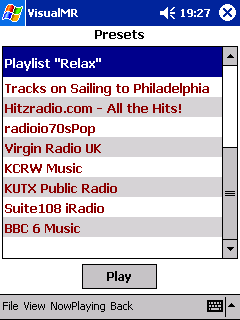
A useful new feature introduced with the 2.5 firmware are 'Presets' which are shortcuts to custom, predefined music (please look into the SoundBridge 2.5 manual for details about Presets). The 'Browse Presets' form allows you to select a given preset and play its contents.
The application is based on Microsoft's .Net-Framework and therefore should work on any Windows platform where it is installed (Windows Mobile SmartPhones are currently not supported). To read more about installing VisualMR and afterwards to download it, please choose your platform: